Use the host’s network address
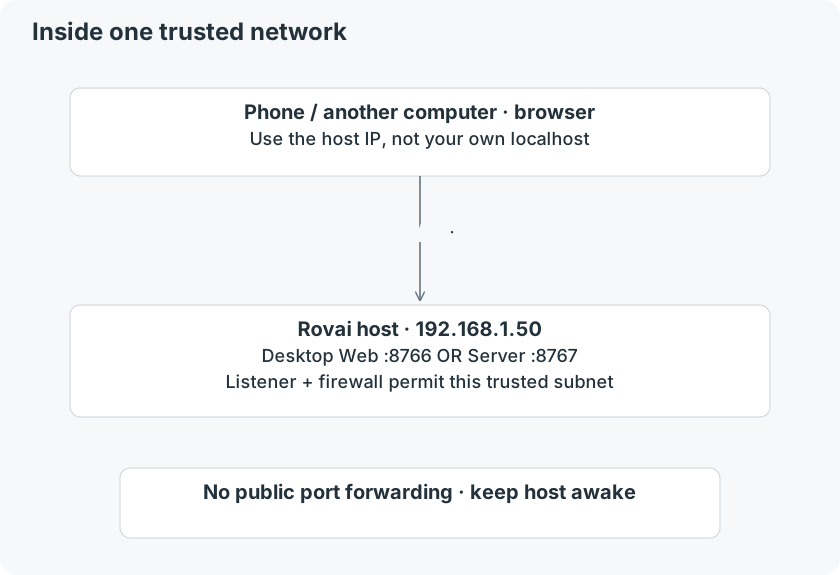
Find the right IP on the host
- Connect both devices to the same trusted network. A similar Wi-Fi name is not enough if one device is on a guest network or an isolated VLAN.
- On macOS, open System Settings → Network, choose the active connection and read its TCP/IP address. On Windows, run ipconfig and find the active adapter’s IPv4 address. On Linux, run ip -br -4 addr.
- Choose the address of the interface reachable from the other device, for example 192.168.1.50. Ignore loopback, disconnected adapters and addresses belonging to unrelated VPNs.
- For repeated use, reserve the host’s DHCP address in your router or check it again after a network change.
Choose the listening scope
- Desktop Web
- Enable Remote connection. In Desktop 0.4.1 the service listens on network interfaces at the selected port (default 8766). Restrict who can reach it through the host firewall.
- Independent Server
- Stop the previous foreground instance, then start it with a LAN listen address and --allow-insecure-lan. A specific interface address limits the listener; 0.0.0.0 covers all IPv4 interfaces.
Server · bind one LAN interface
rovai-server --data-dir "$HOME/.rovai-server" \
--listen 192.168.1.50:8767 --allow-insecure-lanUse the executable for your installation
Replace the IP with your host’s actual address. On macOS 0.4.0, replace rovai-server with "$HOME/.local/share/rovai-server/current/rovai-server" as described in the installation guide. On Windows PowerShell, place the arguments on one line instead of using the shell continuation character above.
The flag acknowledges unencrypted HTTP on a trusted network; it does not turn off login. Do not forward this port from your Internet router or permit it from every public address.
Allow only the required local traffic
- If the host firewall blocks the listener, add an inbound rule for the selected TCP port and your trusted local subnet. Keep the firewall enabled.
- On macOS, review the firewall’s application permission for Rovai Desktop or the Server executable. On Windows, limit an inbound rule to the Private profile and the local subnet; do not change an untrusted network to Private just to connect.
- On Ubuntu using UFW, the example below allows a /24 LAN to port 8767. Substitute your real subnet and use port 8766 only for Desktop. It adds a rule; it does not enable or disable UFW.
- Open http://192.168.1.50:8767/ for Server, or http://192.168.1.50:8766/ for Desktop, on the other device. Enter that instance’s Token and open the intended conversation.
Ubuntu UFW · example scoped rule
sudo ufw allow from 192.168.1.0/24 to any port 8767 proto tcp
sudo ufw statusWhen the address does not open
- Wrong network
- Disable neither authentication nor the firewall. Check Wi-Fi, guest isolation, corporate VLAN rules and VPN routing first.
- Loopback-only listener
- 127.0.0.1 is reachable only on the host. Restart Server with the intended interface; changing the URL in your browser does not change the listener.
- Address or port changed
- Read the current host IP and service port again. A remembered browser address can be stale.
- Host asleep / App stopped
- Wake the host, start the intended instance and confirm its status. The browser cannot wake or launch it by itself.
- Page opens, login fails
- Use this instance’s Token and the same address as the page. See the login guide for origin and session errors.